1 Introduction The smooth limit gauge is a special measuring tool for setting. It is simple in structure, easy to use, reliable in inspection, and widely used in mass production. The main job of the gauge design is to look up the table, calculate and determine its ultimate size, select the type of gauge, determine the technical conditions, and draw a work plan. With traditional design methods, the amount of repetitive labor is large, the design efficiency is low, and it is easy to make mistakes. The introduction of computer-aided design technology can solve these problems well and reduce the design cost and improve the design quality. This article is to study and summarize the manual design method of gauges, according to the requirements of parametric drawing, classify the gauges, and then use the AutoLISP language embedded in AutoCAD to develop a computer-aided design program for smooth extreme gauges. 2 Design points of the smooth limit gauge The main contents of the gauge design are the selection of the type of gauge, the calculation of the limit size of the gauge, the determination of technical requirements, and the drawing of work drawings. 2.1 Selection of gauge types There are many types of smooth limit gauges for cylindrical workpieces. Reasonable selection and use have a great influence on the correct judgment of measurement results. Gauge design should be in accordance with Taylor's principle: The rules should be designed to be full-shape, with the basic dimensions equal to the maximum physical dimensions and the length equal to the length of the fit of the part being tested. The contact between the gauge and the workpiece is surface contact and controls the size of the action. The stop gauge should be designed to be incomplete, its basic size is equal to the minimum physical dimension of the workpiece, its measurement should be point contact, and the stop gauge controls the actual size of the workpiece. However, the gauge used in actual production does not fully comply with Taylor's principle and its choice is very flexible. The gauge type is usually selected according to the basic size, and the gauges of various types are applied to different size ranges. Table 1 and Table 2 are the selection decision tables of the hole type and shaft gauges. Table 1 Hole gauge structure type selection decision table basic size 1 ~ 6mm Y basic size> 6 ~ 40mm Y basic size> 40 ~ 50mm Y basic size> 50 ~ 80mm Y basic size> 80 ~ 120mm Y basic size> 120 ~ 180mm Y basic size>180~260mm Y basic size>260~500mm Y needle plug gauge X taper shank cylindrical plug gauge XXX three tooth anti-rotation cylindrical plug gauge XXX three teeth anti-rotation non-full gauge plug XX incomplete Shape Gauge XX Ball Rod Gauge XXX Table 2 Axis Gauge Structure Type Selection Decision Table Basic Size 1~3mm Y Basic Size >3~10mm Y Basic Size >10~80mm Y Basic Size >80~100mm Y Basic Size >100 ~120mm Y Basic size >120~260mm Y Cylindrical ring gauge XXXX Combination caliper X Double headed caliper X Single head double limit caliper (1) XXX Single head double limit caliper (2) XX Single head double limit caliper (3) From the table, we can see from the table that the basic size still cannot uniquely determine the type of gauge, which makes it difficult for the computer to automatically select. Decision table algorithm, the computer gives all applicable type, choice is determined by the designer. 2.2 Calculation of the working size of the gauge The type of the gauge is selected, ie the size of its work needs to be calculated. The general steps for the calculation of the working size of a smooth limit gauge are as follows: The deviation between the hole and the shaft is determined by the “tolerance and fit†GB: ES, EI, es, ei: The gauge design data is used to determine the manufacturing tolerance T and the position factor Z value of the working gauge. : Calculate the limit deviation or working size of various gauges. The formula for calculating the limit deviation according to the basic dimensions is as follows: Working gauge for hole: General deviation = EI + Z + T/2 Lower deviation = EI + ZT/2 Stop: Upper deviation = ES Lower deviation = ES-T axis Work gauge rules: upper deviation = es-Z + T/2 lower deviation = es-ZT/2 stop: upper deviation = ei + T lower deviation = ei
3 system structure system structure. 3.1 Design Condition Input Module Gauge design conditions are the basic dimensions of the hole to be tested and the tolerance zone code. The input uses dialog technology. The dialog has holes or multiple selection buttons for the axis. The basic size edit box and tolerance zone code edit box . When the parameter input is confirmed to be correct, click the OK button, that is, input is completed. With the dialog box input, it is accurate, efficient, and simplifies the user's interactive operation. The dialog design consists of two parts. One is to use a dialog control language to write a dialog driver and to complete the loading, display, activation, concealment, and unloading of the dialog. The design takes into account the coordination and fault tolerance requirements of the parameters. When the basic size exceeds the normal range, the hole or axis does not match the basic deviation code case, the system will prompt and request re-enter. 3.2 The gauge type selection module determines the applicable gauge type according to the input basic size, uses the dialog box display, and at the same time uses the multiple choice one button in the dialog box to give all types of holes or axes for the designer to select one of them. 3.3 limit size calculation module based on the basic size and tolerance with the code number, from the data file to check the hole diameter of the hole to be tested, tolerances, the work of the gauge position factor Z and manufacturing tolerances T, calculate the limit of the basic deviation of the working gauge. 3.4 Parametric Drawing Modules There are several types of work gauges. For a certain structural type, although the structural dimensions will be different, the structural shapes are similar. Therefore, a pattern can be generated with a dedicated program with parameters. When designing the drawing program, combined with the specific gauge structure type, the drawing method of each geometric element in the drawing is considered, and the drawing parameters of each geometric element such as the circle center coordinates and radius are deduced from the input variables of the program. The dimensions, tolerances, geometric tolerances, surface roughness, etc., as well as their position, are drawn together. The parametric drawing module calls the corresponding drawing program according to the selected gauge type, assigns values ​​to the input variables, and draws a gauge work diagram. The module also includes sub-modules such as drawing initialization and technical condition labeling. 4 Design Example Design Ø46f7 axis work gauge. After loading and running the design program, a dialog box will pop up. Enter the basic size and tolerance zone code. You can see that the applicable gauge type is cylindrical ring gauge and single head double limit gauge. After the single-head double-limit calipers are selected, the gauge operation diagram is output.
3 system structure system structure. 3.1 Design Condition Input Module Gauge design conditions are the basic dimensions of the hole to be tested and the tolerance zone code. The input uses dialog technology. The dialog has holes or multiple selection buttons for the axis. The basic size edit box and tolerance zone code edit box . When the parameter input is confirmed to be correct, click the OK button, that is, input is completed. With the dialog box input, it is accurate, efficient, and simplifies the user's interactive operation. The dialog design consists of two parts. One is to use a dialog control language to write a dialog driver and to complete the loading, display, activation, concealment, and unloading of the dialog. The design takes into account the coordination and fault tolerance requirements of the parameters. When the basic size exceeds the normal range, the hole or axis does not match the basic deviation code case, the system will prompt and request re-enter. 3.2 The gauge type selection module determines the applicable gauge type according to the input basic size, uses the dialog box display, and at the same time uses the multiple choice one button in the dialog box to give all types of holes or axes for the designer to select one of them. 3.3 limit size calculation module based on the basic size and tolerance with the code number, from the data file to check the hole diameter of the hole to be tested, tolerances, the work of the gauge position factor Z and manufacturing tolerances T, calculate the limit of the basic deviation of the working gauge. 3.4 Parametric Drawing Modules There are several types of work gauges. For a certain structural type, although the structural dimensions will be different, the structural shapes are similar. Therefore, a pattern can be generated with a dedicated program with parameters. When designing the drawing program, combined with the specific gauge structure type, the drawing method of each geometric element in the drawing is considered, and the drawing parameters of each geometric element such as the circle center coordinates and radius are deduced from the input variables of the program. The dimensions, tolerances, geometric tolerances, surface roughness, etc., as well as their position, are drawn together. The parametric drawing module calls the corresponding drawing program according to the selected gauge type, assigns values ​​to the input variables, and draws a gauge work diagram. The module also includes sub-modules such as drawing initialization and technical condition labeling. 4 Design Example Design Ø46f7 axis work gauge. After loading and running the design program, a dialog box will pop up. Enter the basic size and tolerance zone code. You can see that the applicable gauge type is cylindrical ring gauge and single head double limit gauge. After the single-head double-limit calipers are selected, the gauge operation diagram is output.
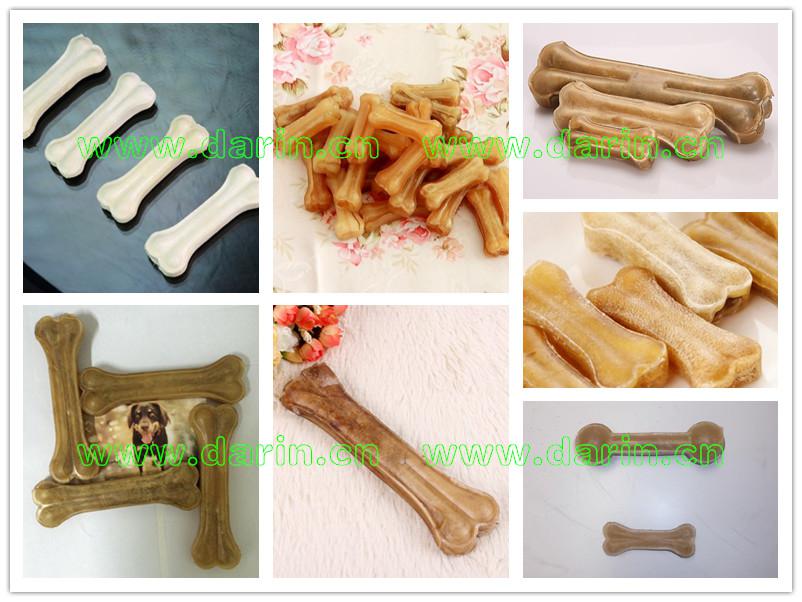
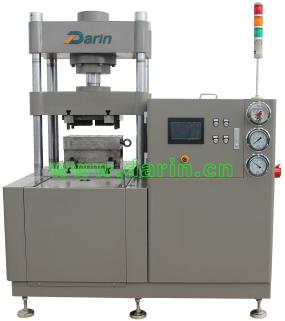
Rawhide Bone Pressing Machine could produce pet bone with rawhide as raw materials.
Rawhide Bone Pressing Machine is type of Flour Column and Three Board, the upmost output tonnage can be adjustable.
Rawhide Bone Pressing Machine can be adjusted among the range of 5t-60t according to the different products' procedures, the purpose is to arrive the best required output.
Rawhide Bone Pressing Machine has two types, manual operation and automatic operation, meanwhile, it can count and timing automatically, safe and protective.


Rawhide Bone Pressing Machine
Pet Snack Processing Machine,Dog Snacks Making Machine,Rawhide Bones Making Machine,Bone Pressed Machine
Jinan Darin Machinery Co., Ltd. , https://www.globaldarin.com
![<?echo $_SERVER['SERVER_NAME'];?>](/template/twentyseventeen/skin/images/header.jpg)